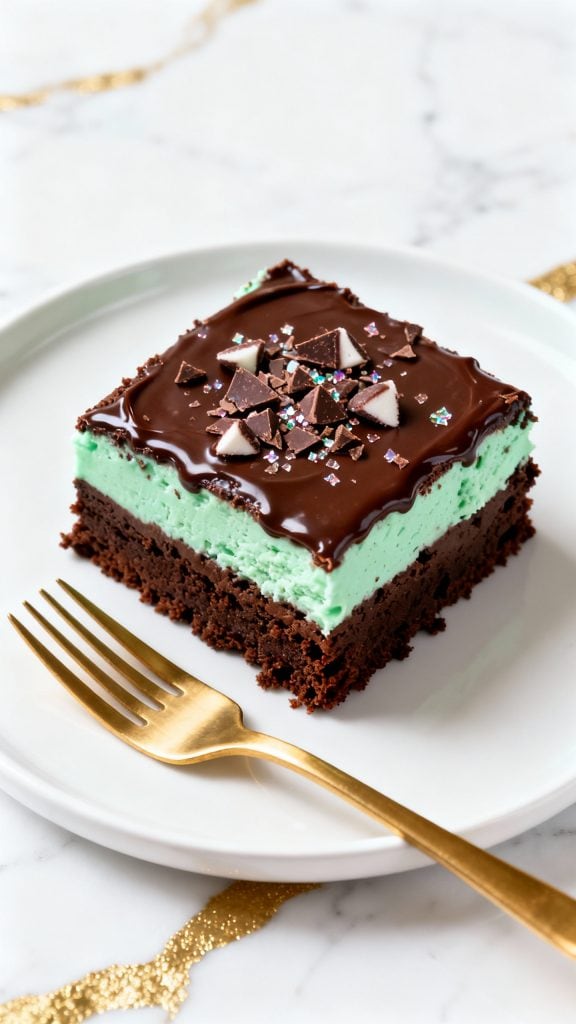
YUMMY Mint Frosted Fudgy Brownies
If you love rich chocolate and cool mint together, you’re in for a treat.
These mint frosted fudgy brownies are seriously next-level.
Think chewy, chocolatey brownies with a smooth, creamy mint layer on top—and just a bit of extra chocolate to finish it off.
They’re easy to make, super satisfying, and always a hit at parties or for just a cozy night in.

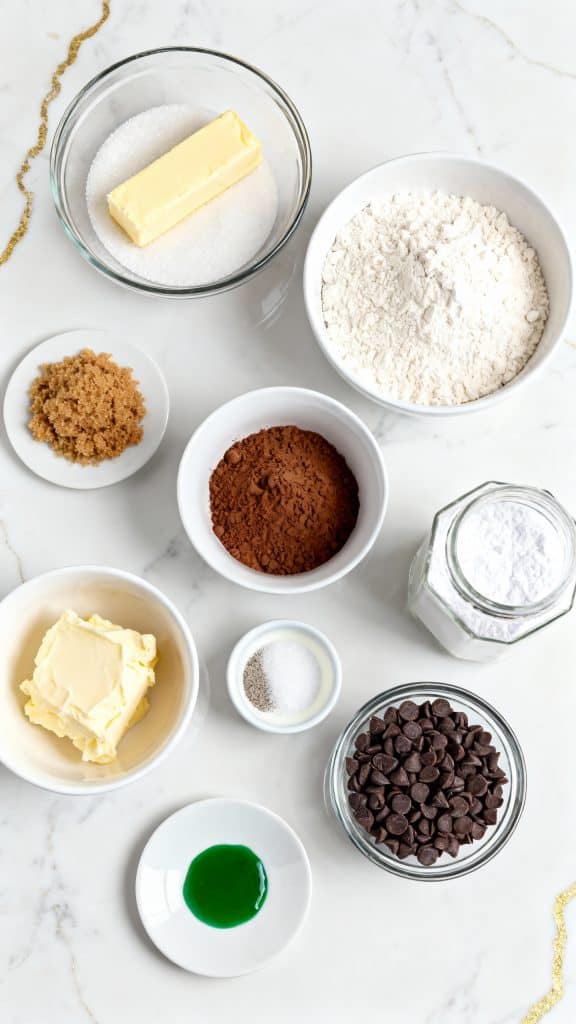
What You’ll Need
Brownie Base:
- 1 cup (2 sticks) unsalted butter, melted
- 1 ½ cups granulated sugar
- 1 cup brown sugar, packed
- 4 large eggs
- 1 tablespoon vanilla extract
- 1 cup all-purpose flour
- 1 cup unsweetened cocoa powder
- ½ teaspoon salt
Mint Frosting:
- ½ cup unsalted butter, softened
- 2 cups powdered sugar
- 1–2 tablespoons milk
- ½ teaspoon peppermint extract
- Green food coloring (a few drops)
Chocolate Topping:
- ¾ cup semisweet chocolate chips
- 3 tablespoons unsalted butter
Why I Love This Recipe
I first made these for a birthday party and everyone asked for the recipe before dessert was even over. The mint-chocolate combo is just classic. Here’s why they’re one of my go-to treats:
- They layer beautifully for that bakery-style look
- The mint flavor is fresh but not overpowering
- Fudgy brownies hold up perfectly under the frosting and glaze
- You can make them ahead of time
- They taste even better the next day
Makes: 16 brownies
Total Time: 50 minutes
Brownie + Frosting + Topping Recipe Instructions
Step 1: Make the Brownie Batter
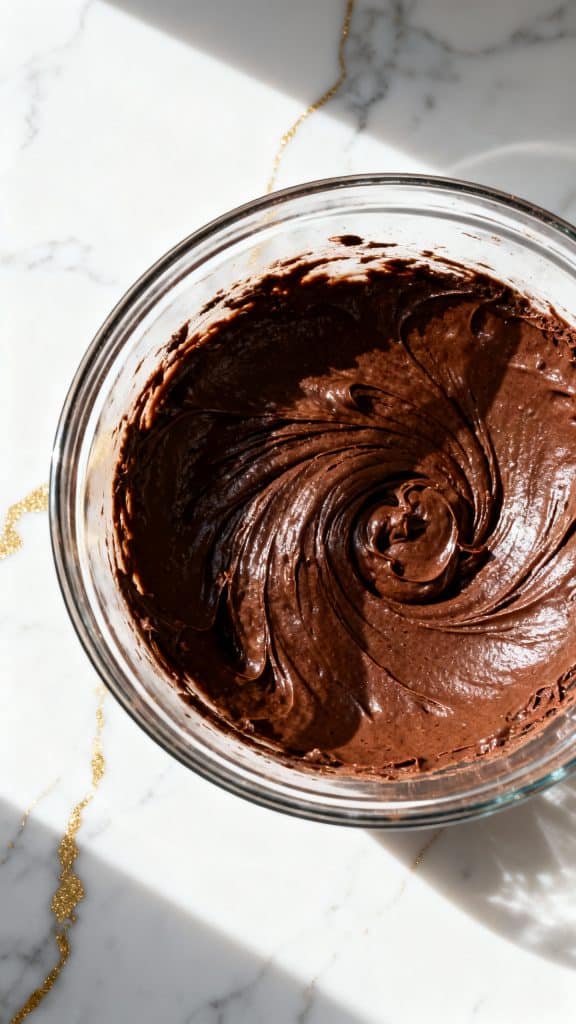
In a large mixing bowl, whisk together 1 cup melted unsalted butter, 1 ½ cups granulated sugar, and 1 cup packed brown sugar until smooth. Add 4 large eggs and 1 tablespoon vanilla extract. Mix until combined. Then add 1 cup all-purpose flour, 1 cup unsweetened cocoa powder, and ½ teaspoon salt. Stir until just combined—don’t overmix.
Step 2: Bake the Brownies
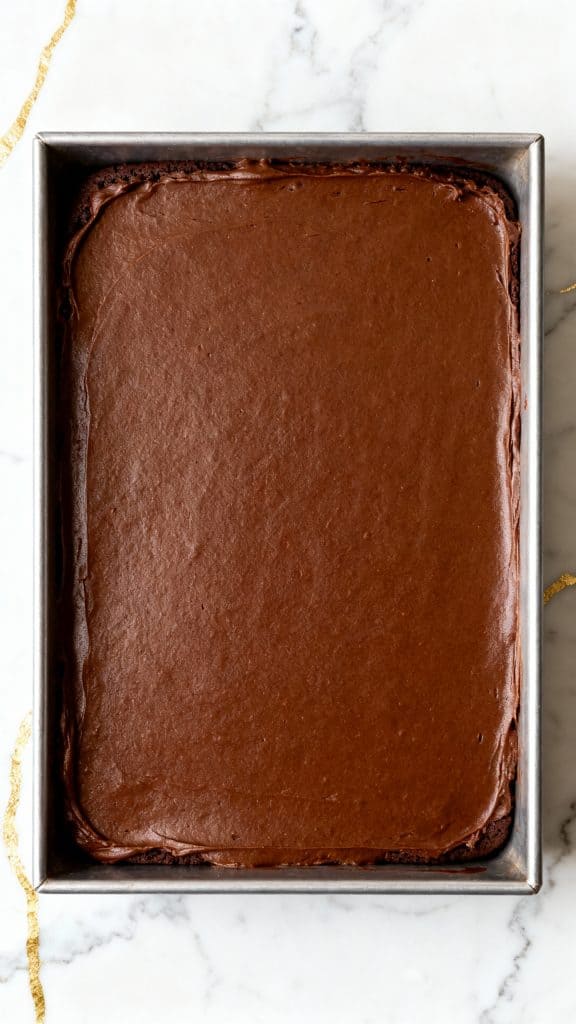
Pour the batter into a parchment-lined 9×13 baking pan. Smooth the top and bake at 350°F (175°C) for 25–30 minutes, or until a toothpick comes out with a few moist crumbs. Let cool completely.
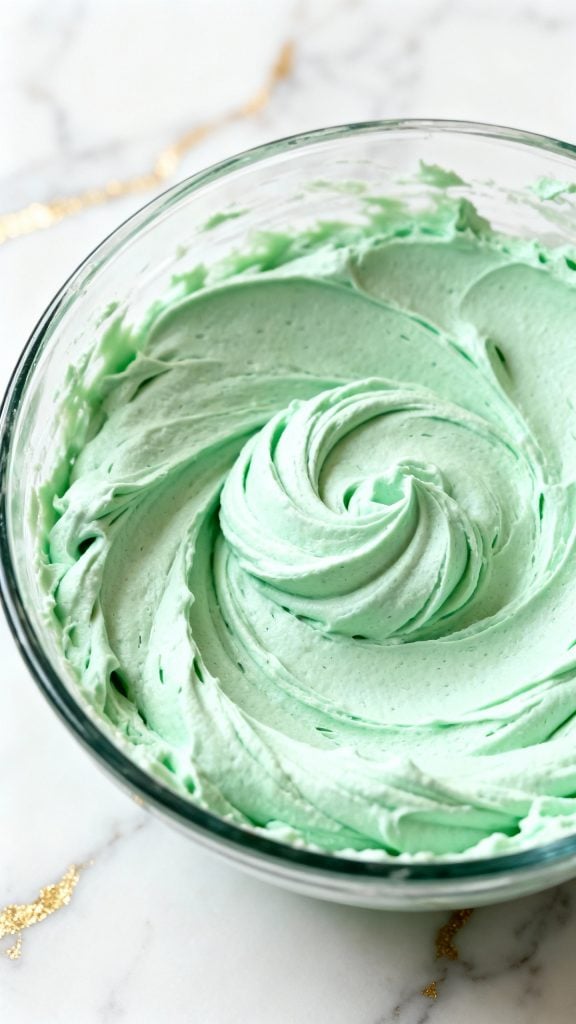
Step 3: Make the Mint Frosting
In a clean bowl, use a hand mixer to beat ½ cup softened butter until creamy. Add 2 cups powdered sugar, 1–2 tablespoons milk, ½ teaspoon peppermint extract, and a few drops of green food coloring. Beat until smooth and fluffy.
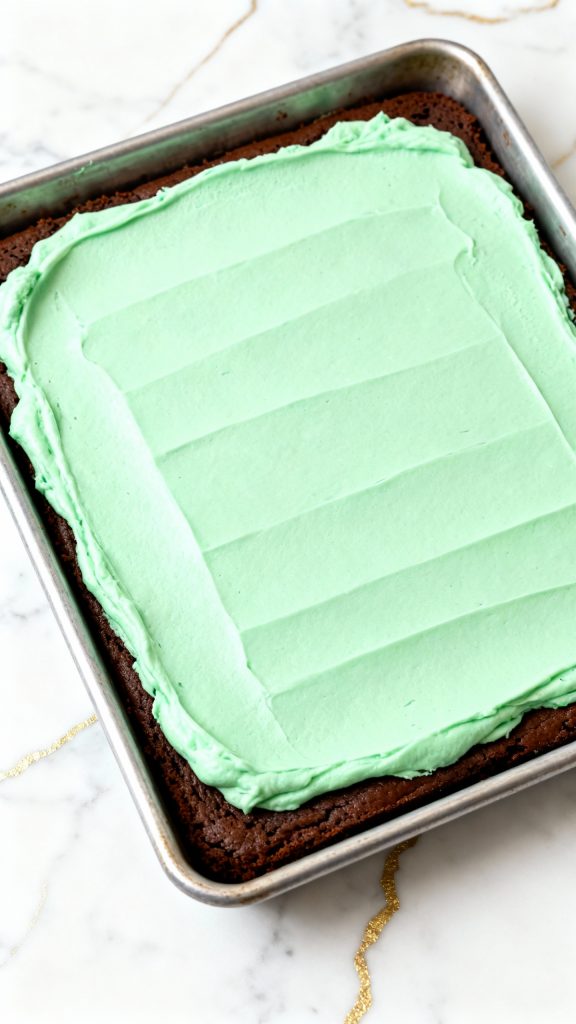
Step 4: Frost the Brownies
Once the brownies are completely cool, spread the mint frosting evenly over the top. Chill in the fridge for 20 minutes to set.
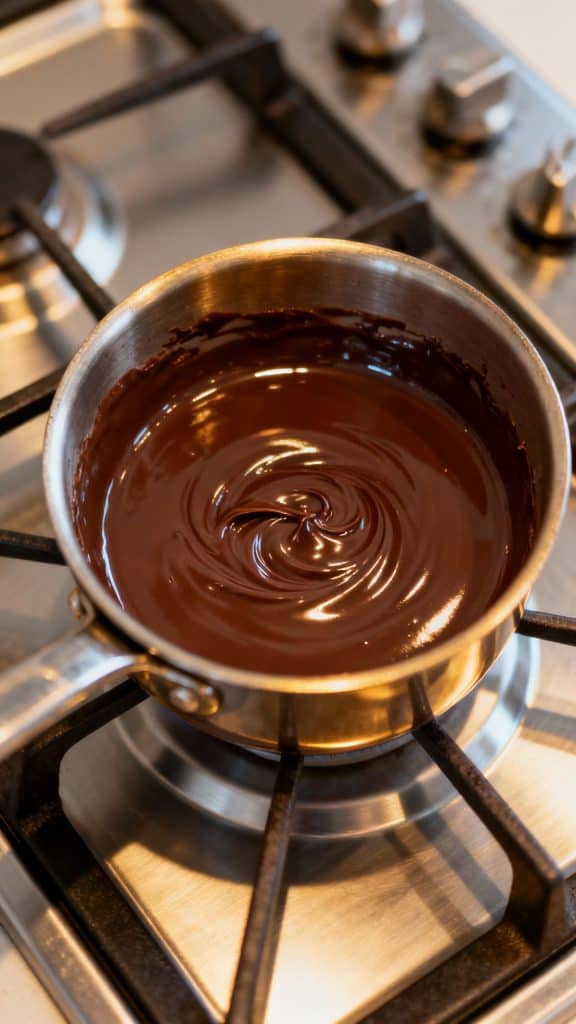
Step 5: Make the Chocolate Topping
Melt ¾ cup semisweet chocolate chips with 3 tablespoons butter in a small saucepan over low heat until smooth and glossy. Stir constantly.
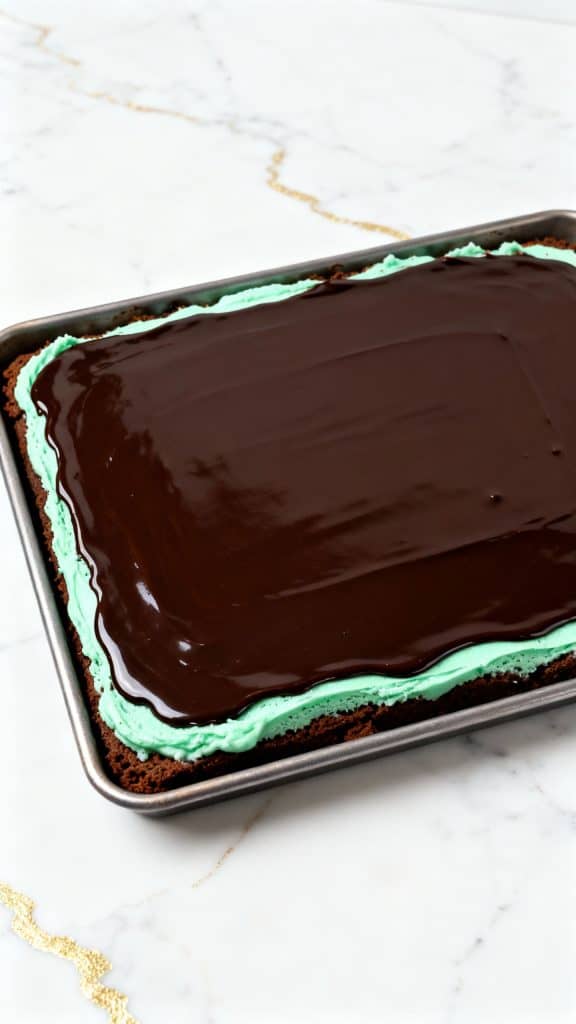
Step 6: Pour the Chocolate Glaze
Pour the chocolate glaze over the chilled mint frosting. Gently tilt the pan to spread it evenly. Chill again for 30 minutes or until set. Cut into squares to serve.
Pro Tips
- Let the brownies cool completely before frosting or the mint layer will melt.
- Use peppermint extract—not mint extract—for the best flavor
- Chill between each layer to keep them clean and defined
- For clean slices, dip your knife in hot water and wipe between cuts
- Don’t overbake the brownies—look for moist crumbs, not a clean toothpick
Tools You’ll Need
- Mixing bowls (3)
- Rubber spatula
- Whisk
- Hand mixer
- 9×13 metal baking pan
- Parchment paper
- Offset spatula
- Saucepan
Substitutions and Variations
- Swap peppermint extract for spearmint if you like a milder taste
- Add crushed Oreos on top for a fun crunch
- Use dark chocolate chips in the glaze for a deeper flavor
- Make it gluten-free with 1:1 gluten-free flour
Make-Ahead Tips
- You can make the brownies a day ahead and frost the next day
- Store the whole pan in the fridge, covered, until ready to serve
- These freeze great! Wrap tightly and freeze up to 2 months
Leftovers & Storage
Store leftover brownies in an airtight container in the fridge for up to 5 days. For longer storage, freeze in layers with parchment paper in between.
Macros Information (Per Brownie, makes 16)
- Calories: 310
- Carbs: 38g
- Protein: 3g
- Fat: 17g
- Sugar: 29g
Why This Recipe Works (Quick Science)
Butter and sugar are melted together first, which helps give these brownies that dense, chewy texture. The cocoa powder gives deep chocolate flavor without making the batter too runny. The cool mint layer cuts the richness perfectly. Layering and chilling between each step keeps everything clean and smooth.
Common Mistakes
- Spreading frosting on warm brownies—it’ll melt and slide
- Not chilling long enough between layers
- Using too much peppermint extract—it can get overpowering fast
- Overbaking—watch carefully at the end
What to Serve With
- A glass of cold milk
- Fresh strawberries or raspberries
- A scoop of vanilla or mint chip ice cream
- Hot coffee or mint tea
FAQ
Can I double this recipe?
Yes! Use a larger baking pan or make two batches.
Can I skip the glaze?
Sure, but it adds a delicious finish and seals in the frosting.
Do I need a mixer?
You can mix by hand, but the frosting is smoother with a hand mixer.
Can I make these nut-free?
They are naturally nut-free, just check all your labels.
Final Thoughts
These mint frosted fudgy brownies are a dessert you’ll want to make over and over. They’re rich, cool, sweet, and just the right amount of indulgent. Give them a try and leave a comment to let me know how they turned out—or what twist you added.