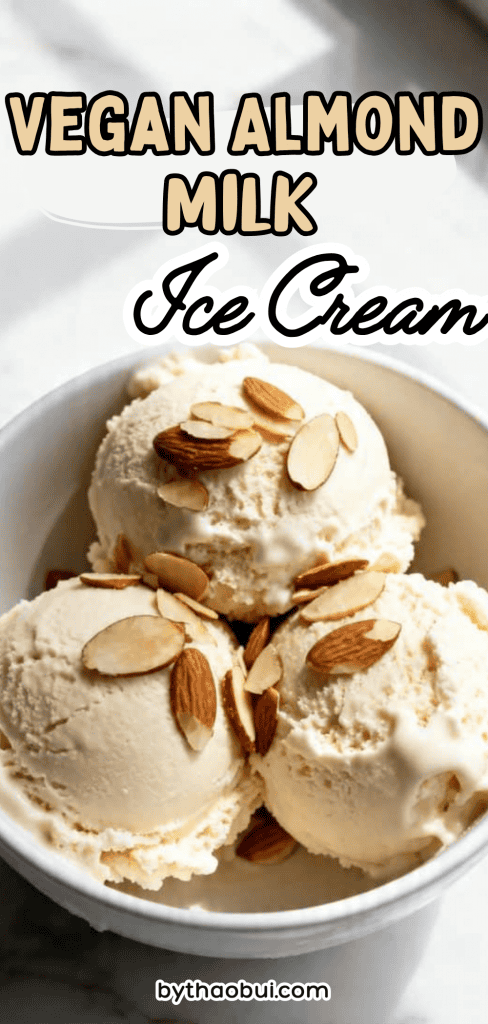
Vegan Almond Milk Ice Cream
This vegan almond milk ice cream is smooth, creamy, and easy to make with simple ingredients.
It has a clean vanilla-almond flavor and a soft, scoopable texture that feels like a real treat.
I love this one because it tastes special without being fussy, and it works great for warm days, birthdays, or those nights when you just want something cold and sweet after dinner.
Why I Love This Recipe
The first time I made almond milk ice cream at home, I was trying to get that creamy ice cream feel without eggs or dairy. A lot of dairy-free versions I tried were either icy, too hard, or tasted a little flat. After a few rounds, this combo finally gave me what I wanted: a smooth texture, a nice vanilla flavor, and a recipe that feels easy enough to make again.
What I really love is how simple it is. You do not need a long ingredient list, and each ingredient has a job. The almond milk keeps it light, the coconut cream makes it rich, and the cornstarch helps keep the texture from turning icy. It is the kind of recipe that feels homemade in the best way.
A few reasons this one stays in my regular dessert rotation:
- It is creamy, not icy
- The flavor is simple and classic
- It is dairy-free and vegan
- It is easy to dress up with toppings
- It feels fancy, but the steps are very doable
Recipe At a Glance
Servings: 6
Prep time: 15 minutes
Cook time: 10 minutes
Chill time: 4 hours
Churn time: 20 to 25 minutes
Total time: About 5 hours 25 minutes
What You’ll Need
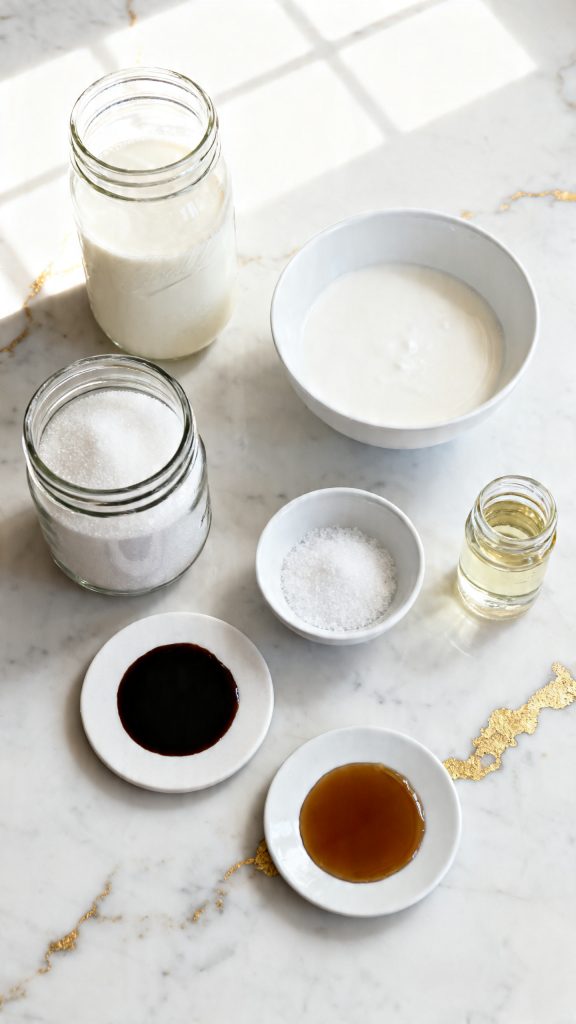
- 2 cups unsweetened almond milk
- 1 can (13.5 ounces) full-fat coconut milk
- 3/4 cup granulated sugar
- 2 tablespoons cornstarch
- 1 tablespoon light corn syrup
- 1 tablespoon pure vanilla extract
- 1/4 teaspoon fine sea salt
- 1/4 teaspoon almond extract
Tools You’ll Need
- Medium saucepan
- Whisk
- Wooden spoon or silicone spatula
- Medium mixing bowl
- Fine-mesh strainer
- Measuring cups and measuring spoons
- Ice cream maker
- Freezer-safe loaf pan or container
- Plastic wrap or lid
Pro Tips
- Chill the base fully before churning. A cold base freezes faster, and that helps make the texture smoother.
- Do not skip the cornstarch. That little bit helps keep the ice cream from getting too icy.
- Use full-fat coconut milk, not light. The extra fat makes a big difference.
- Add the vanilla and almond extract after cooking so the flavor stays bright.
- Let the finished ice cream sit at room temperature for 5 to 10 minutes before scooping if it gets very firm in the freezer.
Substitutions and Variations
- Swap the light corn syrup with 1 tablespoon agave syrup or maple syrup. Corn syrup gives the smoothest texture, but these still work.
- Use 1 teaspoon vanilla bean paste instead of vanilla extract for deeper flavor.
- Add 1/3 cup mini dairy-free chocolate chips during the last minute of churning.
- Stir in 1/4 cup toasted sliced almonds for crunch.
- Add 2 tablespoons cocoa powder with the sugar and cornstarch for a chocolate version.
- Use oat milk in place of almond milk, but the flavor will change a bit.
Make-Ahead Tips
You can make the ice cream base 2 days ahead and keep it covered in the fridge. You can also freeze the churned ice cream in a loaf pan up to 2 weeks. Press plastic wrap right on the surface to help stop ice crystals.
Why This Recipe Works (Quick Science)
This recipe works because each ingredient helps build a better texture.
The coconut milk adds fat, and fat is what makes ice cream feel creamy on your tongue. Almond milk brings the almond flavor and keeps the base lighter. Cornstarch thickens the mix, which helps trap water so fewer large ice crystals form. Sugar does more than sweeten. It also lowers the freezing point, so the ice cream stays softer and easier to scoop. The spoonful of corn syrup helps with that too, giving the ice cream a smoother finish.
That is why this recipe tastes creamy even without dairy or eggs.
Recipe and Instructions
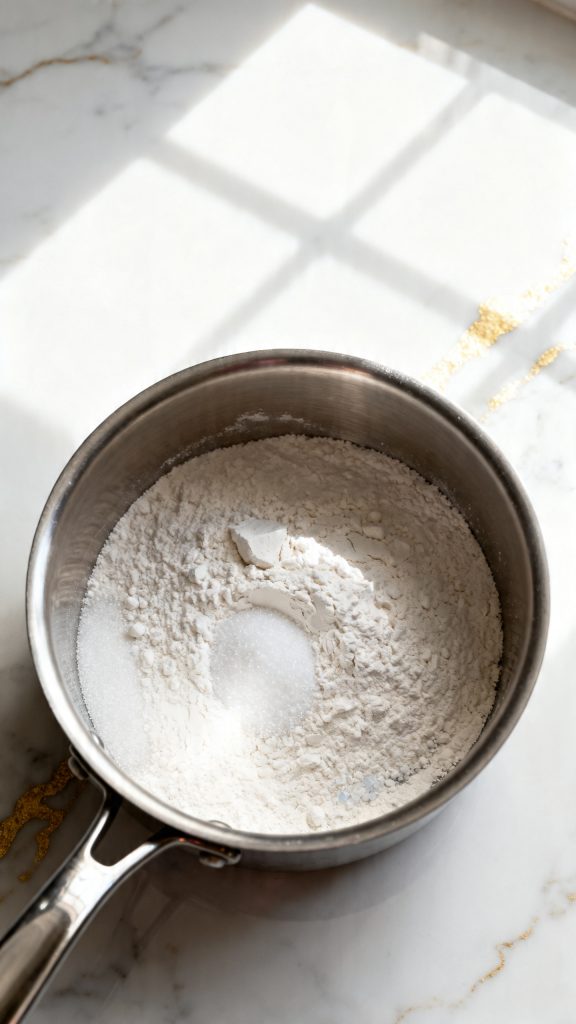
Step 1: Mix the dry ingredients
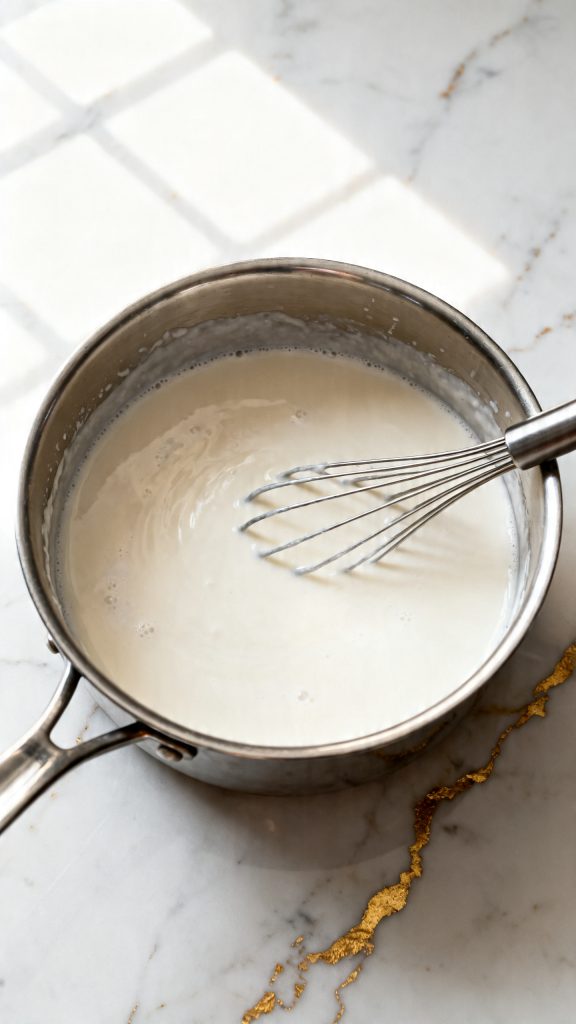
In a medium saucepan, whisk together 3/4 cup granulated sugar, 2 tablespoons cornstarch, and 1/4 teaspoon fine sea salt. This helps the cornstarch spread evenly, so you do not get lumps later.
Step 2: Whisk in the milks and syrup
Slowly pour in 2 cups unsweetened almond milk and 1 can (13.5 ounces) full-fat coconut milk while whisking. Add 1 tablespoon light corn syrup and whisk until the mixture looks smooth and the coconut milk is fully blended in.
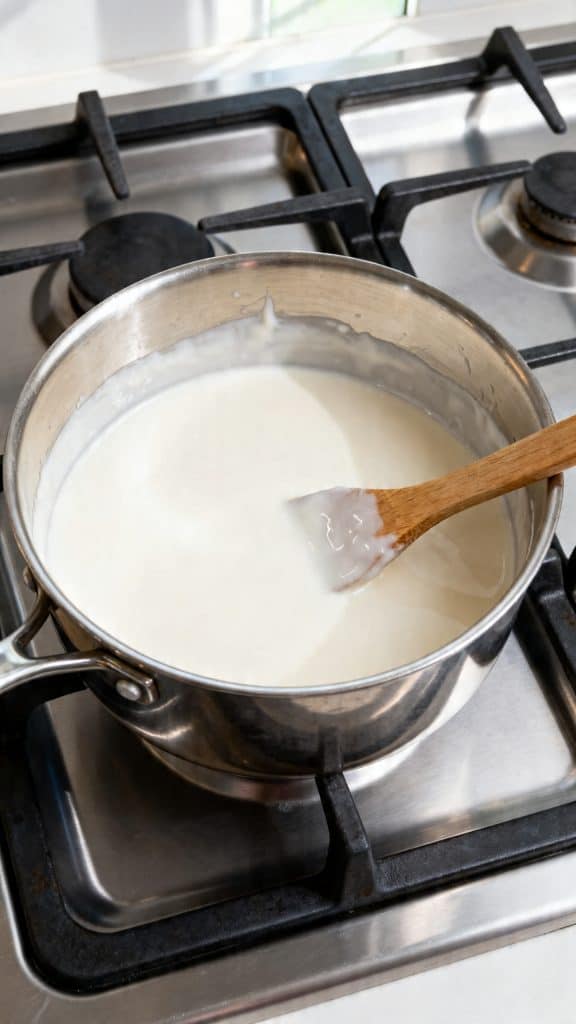
Step 3: Cook the base
Set the saucepan over medium heat. Cook for 6 to 8 minutes, whisking often, until the mixture thickens enough to lightly coat the back of a spoon. Do not let it boil hard. A gentle simmer is perfect.
Step 4: Add the flavorings
Take the pan off the heat. Stir in 1 tablespoon pure vanilla extract and 1/4 teaspoon almond extract. Mix well so the flavor is even all the way through.
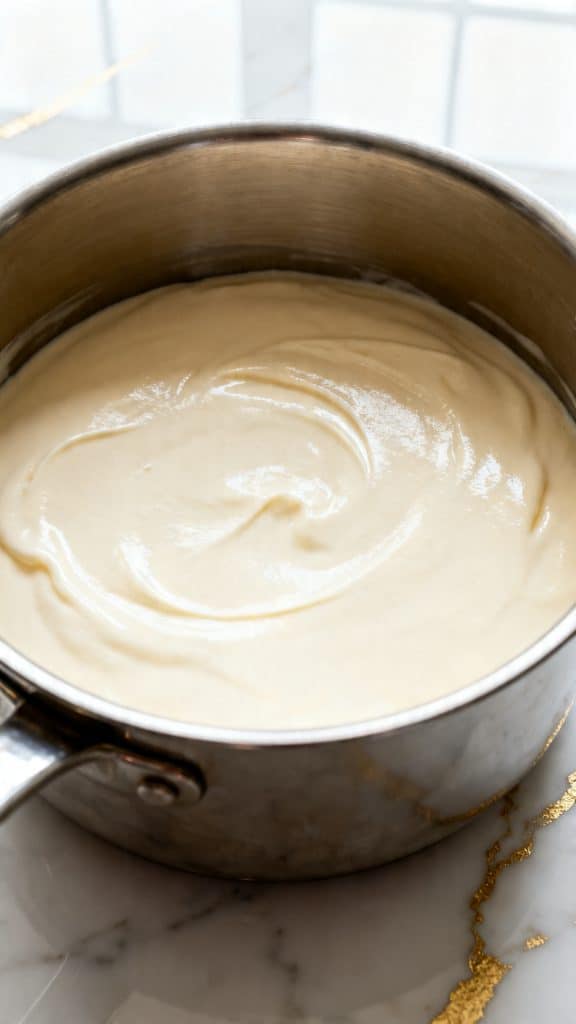
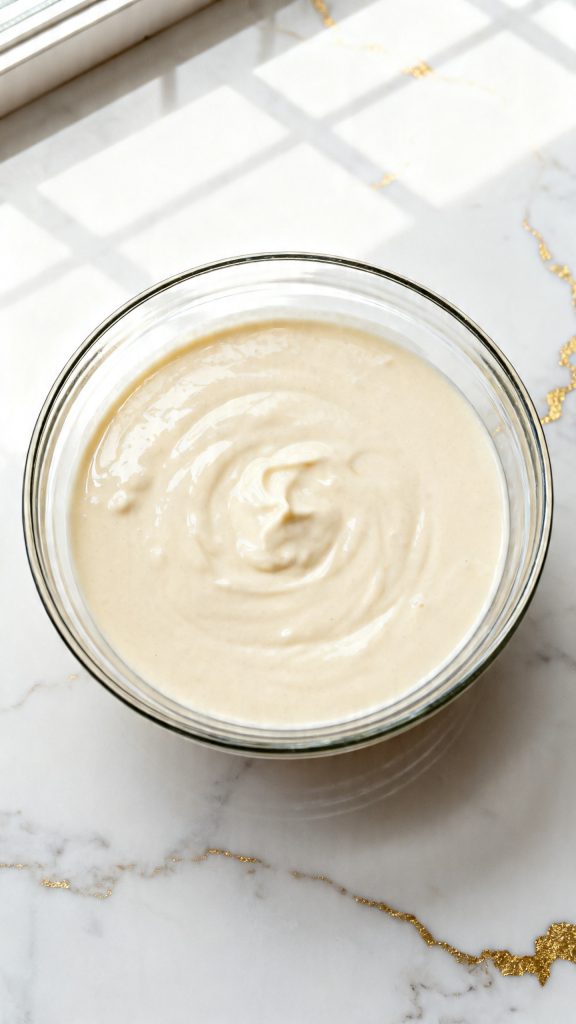
Step 5: Strain and chill
Pour the warm base through a fine-mesh strainer into a medium mixing bowl. Let it cool for about 15 minutes, then cover and chill in the fridge for at least 4 hours, or until completely cold.
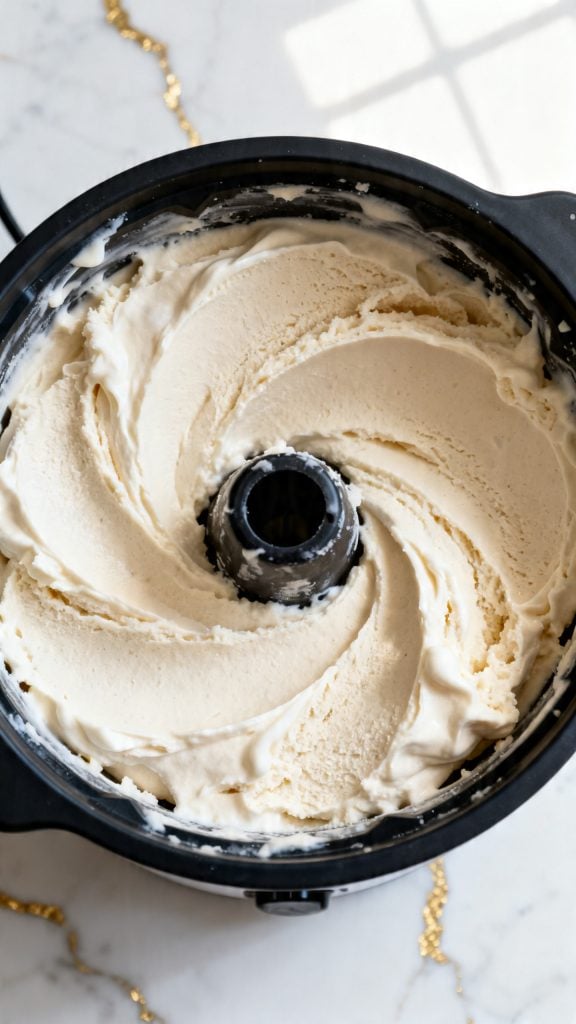
Step 6: Churn the ice cream
Pour the fully chilled base into your ice cream maker and churn for 20 to 25 minutes, or until it looks like soft-serve. The mixture should be thick, fluffy, and creamy.
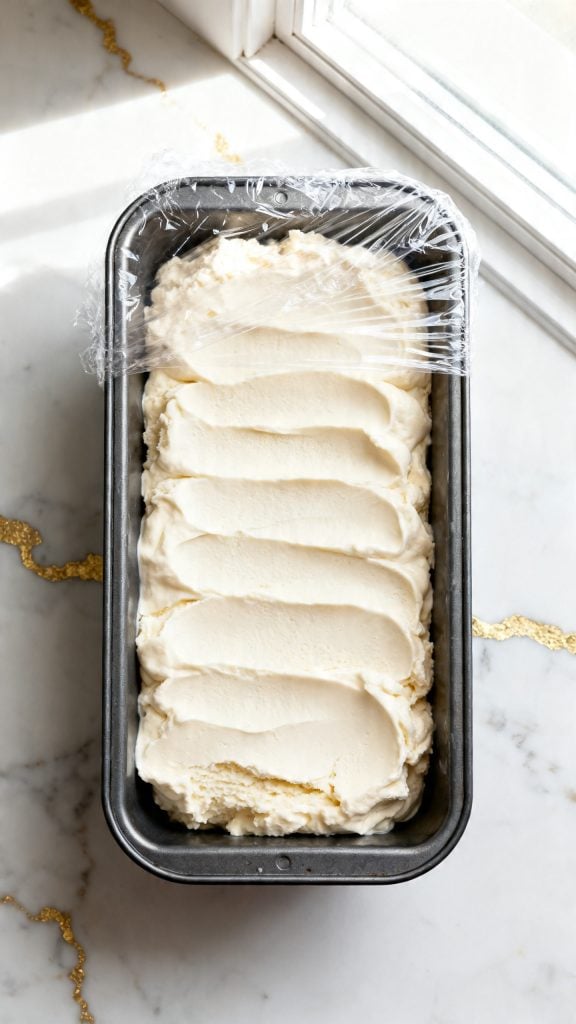
Step 7: Freeze until scoopable
Transfer the churned ice cream to a freezer-safe loaf pan or container. Smooth the top, press plastic wrap right onto the surface, and freeze for 2 to 4 hours until firm enough to scoop.
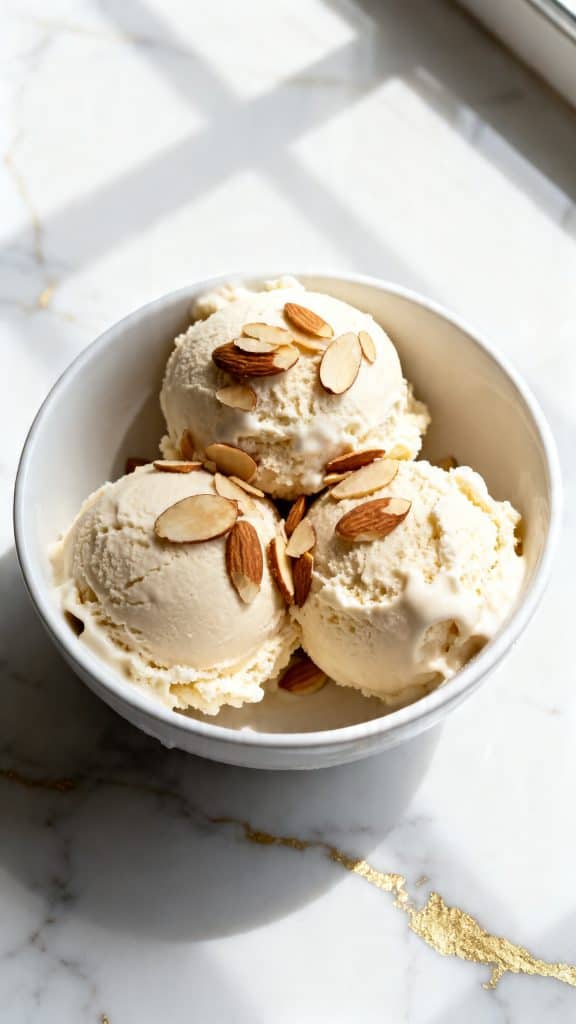
Step 8: Scoop and serve
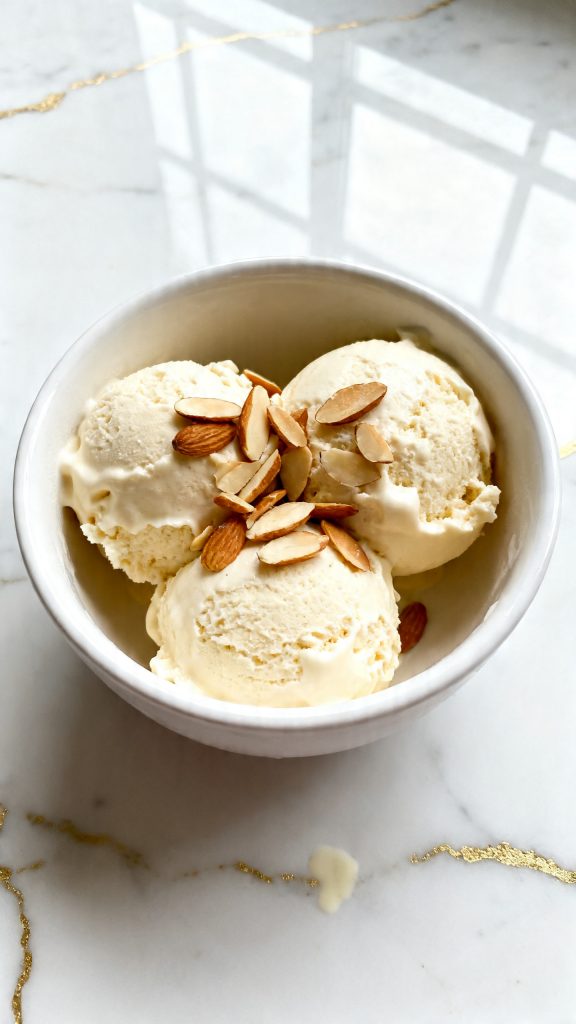
Let the ice cream sit out for 5 to 10 minutes if it is very firm. Scoop into bowls and serve right away. For a simple finish, top with sliced toasted almonds if you like.
Common Mistakes
- Using light coconut milk. The result will be much less creamy.
- Churning a warm base. It will not freeze the right way.
- Skipping the strainer. That can leave tiny lumps in the base.
- Overcooking the mixture. A hard boil can make the texture heavy.
- Freezing without pressing wrap on top. Ice crystals form faster that way.
Macros Information
These numbers are estimates for 1 of 6 servings, without toppings:
- Calories: about 230
- Carbs: about 24g
- Fat: about 15g
- Protein: about 2g
- Fiber: about 1g
- Sugar: about 20g
What to Serve With
This ice cream is great on its own, but it also goes really well with:
- Warm brownies
- Fresh berries
- Sliced peaches or roasted plums
- Crushed cookies
- Toasted almonds
- A drizzle of chocolate sauce
- Espresso for an affogato-style dessert
Leftovers and Storage
Store the ice cream in a tightly covered freezer-safe container for up to 2 weeks. Press plastic wrap right onto the top before adding the lid for the best texture. Let it soften on the counter for 5 to 10 minutes before scooping. For the smoothest texture, keep it toward the back of the freezer where the temperature stays steady.
FAQ
Can I make this without an ice cream maker?
You can, but the texture will not be as creamy. Freeze the chilled base in a shallow pan and stir it every 30 minutes for about 3 hours to break up ice crystals.
Does it taste like coconut?
A little, yes. The almond and vanilla help balance it, but coconut milk is what gives this recipe its rich texture.
Can I use homemade almond milk?
You can, but store-bought unsweetened almond milk is usually more consistent. Homemade almond milk may make the texture a little icier.
Why is my ice cream too hard?
That can happen in home freezers because they run very cold. Let the container sit out for a few minutes before scooping.
Can I add mix-ins?
Yes. Stir in dairy-free chocolate chips, chopped toasted almonds, or cookie pieces during the last minute of churning.
Final Thoughts
This vegan almond milk ice cream is one of those recipes that feels simple but still gives you something really satisfying. It is creamy, fresh-tasting, and easy to make your own with different toppings or mix-ins. Give it a try, scoop it into your favorite bowl, and enjoy every bite. Then come back and leave a comment with how it turned out or any questions that came up while you made it.