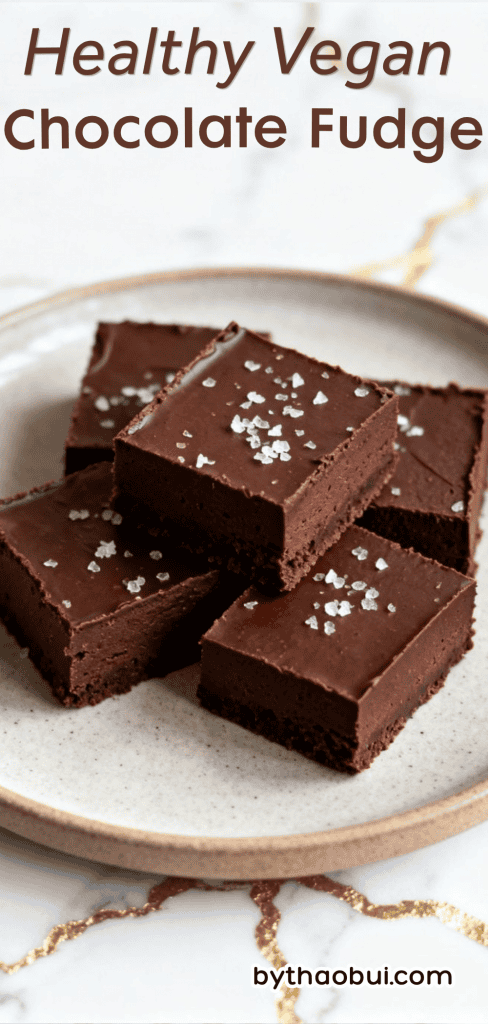
Healthy Vegan Chocolate Fudge
This is one of those recipes that feels a little too good to be true.
It’s rich, chocolatey, and melts in your mouth—but it’s made with simple, wholesome ingredients.
No dairy, no refined sugar, and no complicated steps. Just mix, chill, and enjoy.
Why I Love This Recipe
I started making this fudge when I wanted something sweet after dinner but didn’t want to deal with baking or loads of sugar. The first time I made it, I was surprised how creamy it turned out just from coconut oil and cocoa powder.
Now it’s my go-to when I need something quick and satisfying.
- It only takes about 10 minutes to prep
- No baking required
- Made with pantry staples
- Naturally sweetened
- Rich and satisfying in small portions

Servings and Time
Makes: 12 small squares
Prep Time: 10 minutes
Chill Time: 1–2 hours
Total Time: About 1 hour 15 minutes
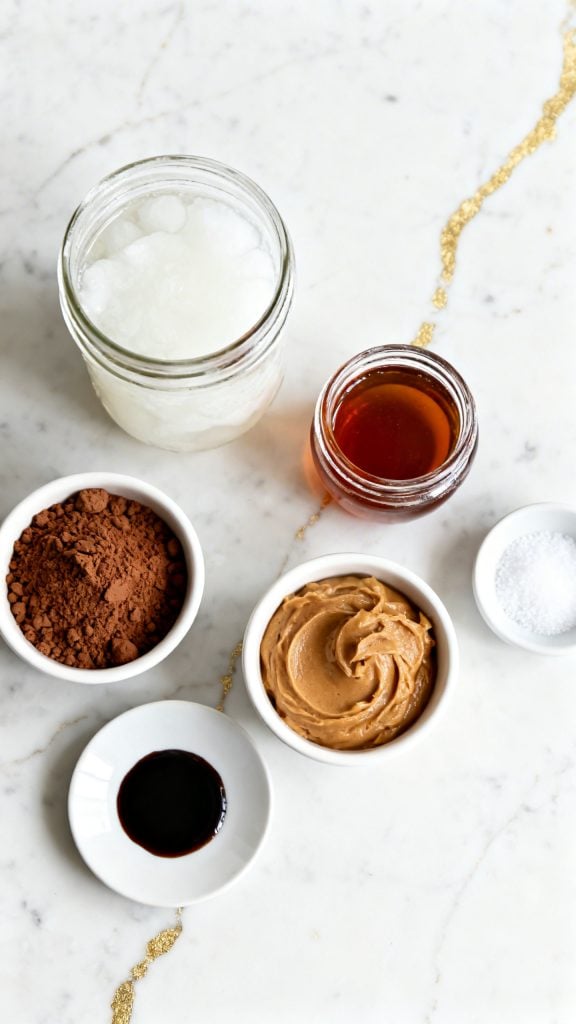
What You’ll Need
- 1/2 cup coconut oil, melted
- 1/2 cup unsweetened cocoa powder
- 1/4 cup maple syrup
- 1/4 cup almond butter (smooth and creamy)
- 1 teaspoon vanilla extract
- Pinch of salt
Tools You’ll Need
- Mixing bowl
- Whisk or spoon
- Measuring cups and spoons
- Small square dish or pan
- Parchment paper
Pro Tips
- Use smooth almond butter so your fudge stays silky
- Melt coconut oil gently so it doesn’t get too hot
- Taste before chilling and adjust sweetness if needed
- Line your pan well so it lifts out easily
- Sprinkle a little sea salt on top for extra flavor
Substitutions and Variations
- Swap almond butter with peanut butter or cashew butter
- Use agave instead of maple syrup
- Add chopped nuts or dried fruit
- Mix in dairy-free chocolate chips
- Add a pinch of cinnamon for warmth
Make Ahead Tips
You can make this up to 5 days ahead. Store it in the fridge and slice when ready to serve.
Instructions
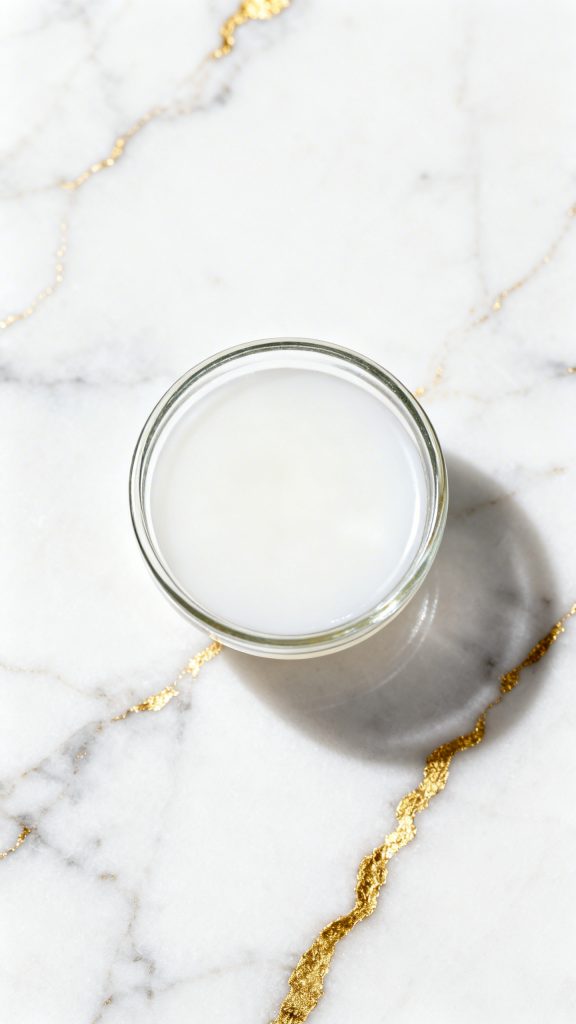
Step 1: Melt the Coconut Oil
Add 1/2 cup coconut oil to a bowl and melt until fully liquid.
Step 2: Mix the Wet Ingredients
Add 1/4 cup maple syrup, 1/4 cup smooth almond butter, and 1 teaspoon vanilla extract into the melted coconut oil. Stir until smooth.
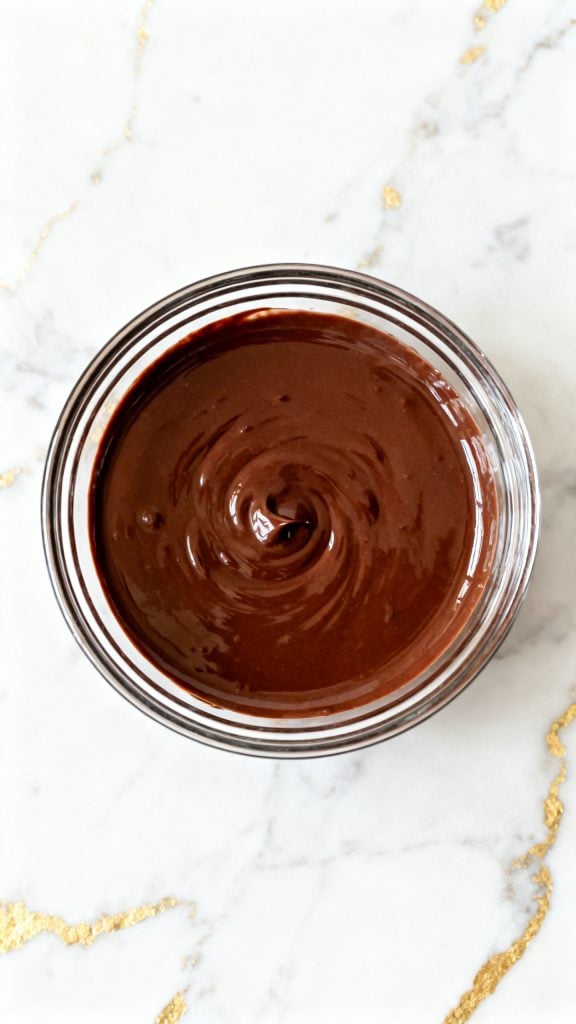
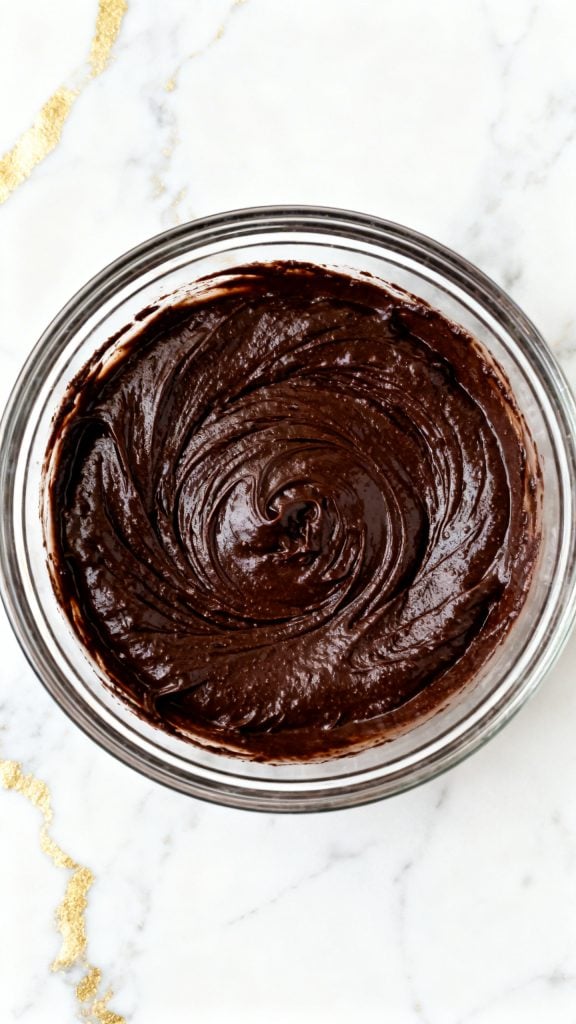
Step 3: Add Cocoa Powder and Salt
Add 1/2 cup unsweetened cocoa powder and a pinch of salt. Stir until thick and fully combined with no lumps.
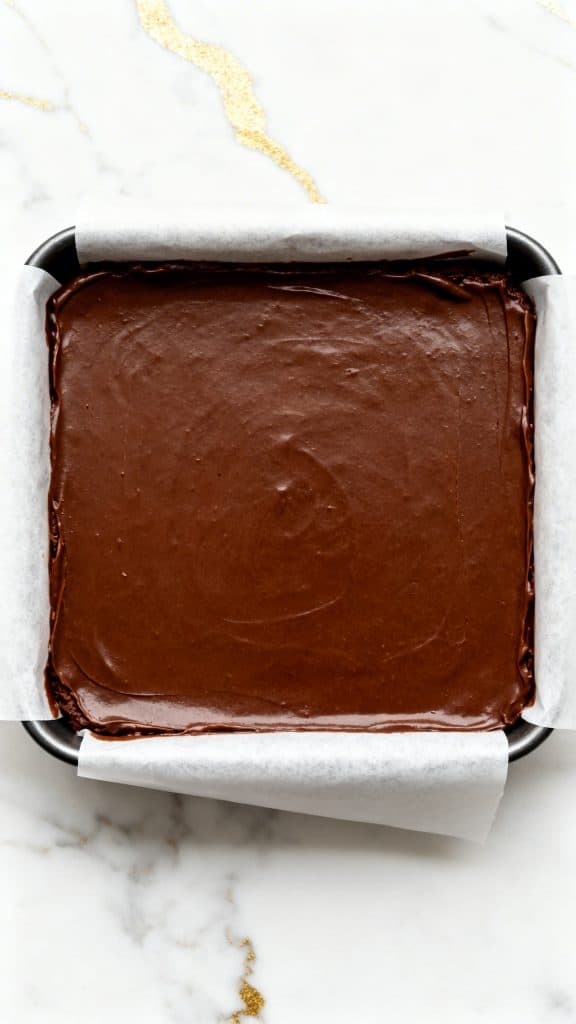
Step 4: Pour into Pan
Line a small dish with parchment paper. Pour the fudge mixture in and spread evenly.
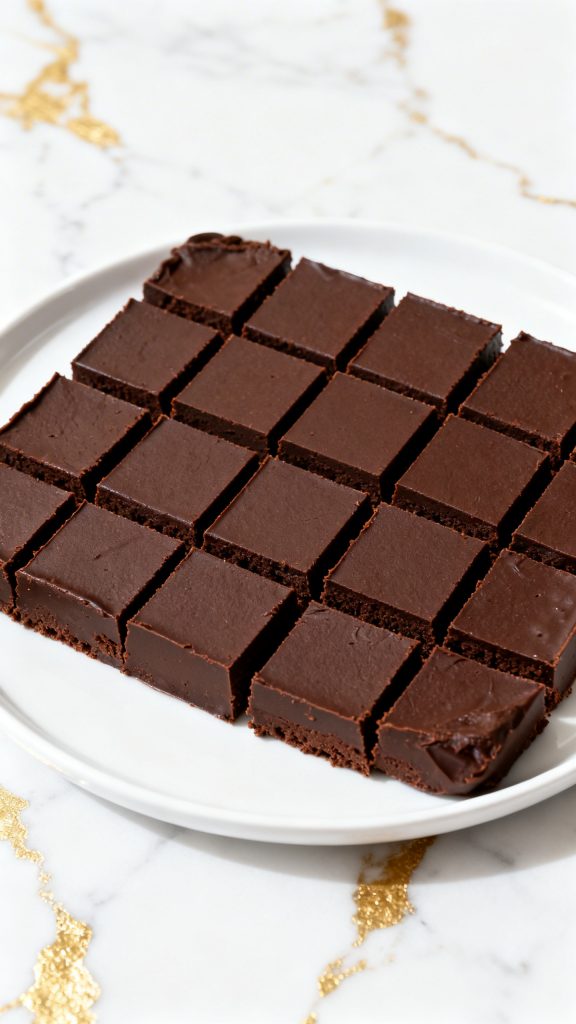
Step 5: Chill Until Firm
Place the dish in the fridge for 1–2 hours until the fudge is firm. Slice into 12 squares.
Macros Information (Per Square)
- Calories: ~120
- Fat: 10g
- Carbs: 7g
- Sugar: 5g
- Protein: 2g
Why This Recipe Works (Quick Science)
Coconut oil solidifies when chilled, which helps the fudge firm up without baking. The almond butter adds structure and creaminess, while cocoa powder gives it that deep chocolate flavor. Maple syrup blends everything together and keeps it smooth.
Common Mistakes
- Using cold coconut oil (it needs to be fully melted)
- Not mixing enough (can leave lumps of cocoa)
- Skipping parchment paper (makes it hard to remove)
- Overheating coconut oil (can affect texture)
What to Serve With
- Fresh berries
- A cup of coffee or tea
- Dairy-free ice cream
- Crushed on top of oatmeal
Leftovers and Storage
Store in an airtight container in the fridge for up to 5 days.
You can also freeze it for up to 2 months—just thaw a few minutes before eating.
FAQ
Can I make this nut-free?
Yes, use sunflower seed butter instead of almond butter.
Is it very sweet?
No, it’s mildly sweet. You can add more maple syrup if you like it sweeter.
Does it melt at room temperature?
It softens a bit, so it’s best kept in the fridge.
Can I double the recipe?
Yes, just use a larger pan.
Final Thoughts
This vegan fudge is simple, rich, and easy to love. It’s one of those recipes you’ll keep coming back to because it just works every time. Give it a try, and when you do, come back and share how it turned out or what fun twist you added.