Candy Cane Fudge
This candy cane fudge is one of those treats that feels fancy but is actually super easy.
It’s creamy, sweet, and has that cool peppermint crunch on top.
Perfect for holidays or anytime you want something fun and festive without a lot of work.

Why I Love This Recipe
I first made this during a busy holiday week when I needed something quick but still special. I remember crushing candy canes at the last minute and thinking, “this better turn out.” It did—and now it’s one of my go-to treats every year.
What makes it great:
- It only uses a few simple ingredients
- No baking needed
- The peppermint flavor is fresh but not too strong
- It looks beautiful without extra effort
- It’s easy to make ahead

What You’ll Need
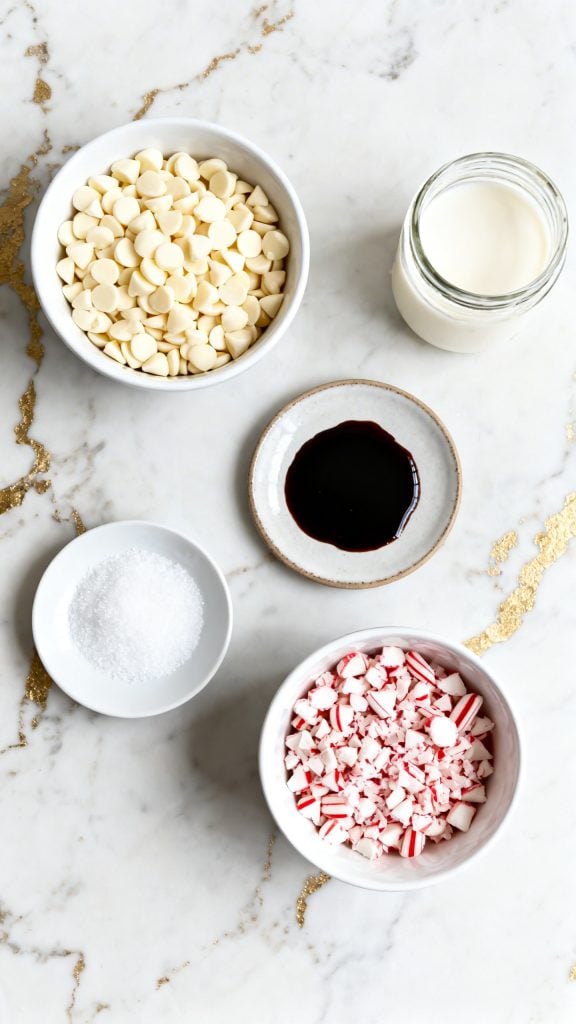
- 3 cups white chocolate chips
- 1 can (14 oz) sweetened condensed milk
- 1 teaspoon peppermint extract
- 1/4 teaspoon salt
- 1/2 cup crushed candy canes
Tools You’ll Need
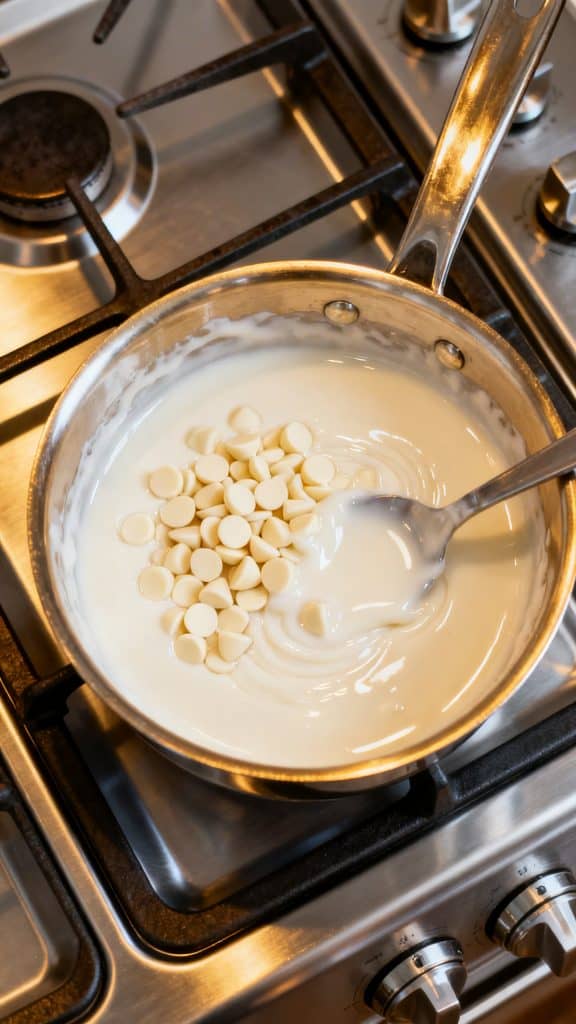
- Medium saucepan
- Wooden spoon or silicone spatula
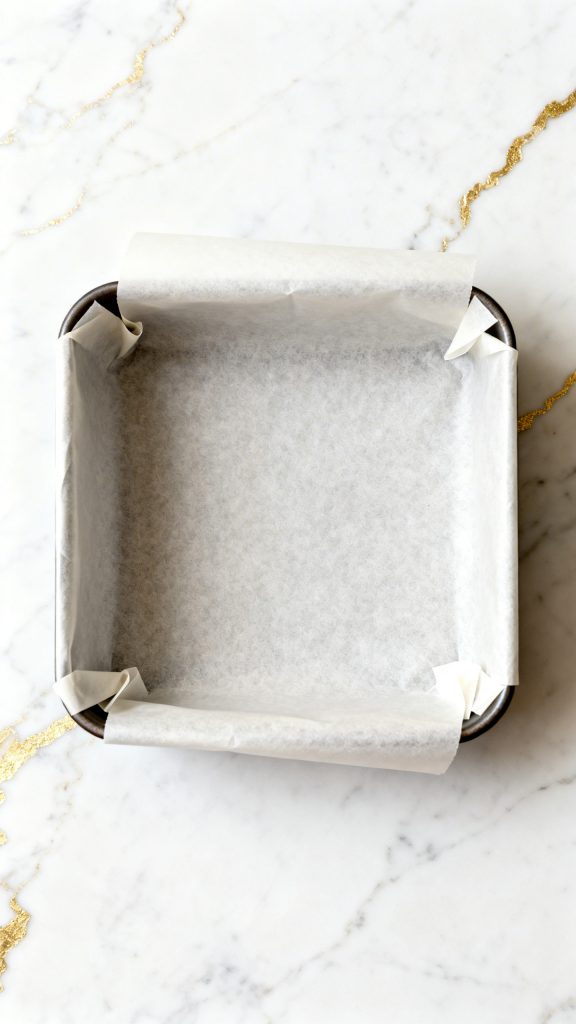
- 8×8 baking dish
- Parchment paper
- Measuring cups and spoons
Servings and Time
Makes: 16 squares
Prep time: 10 minutes
Cook time: 10 minutes
Chill time: 2 hours
Pro Tips
- Crush candy canes in a zip bag with a rolling pin to control the texture
- Don’t overheat the chocolate or it can get grainy
- Line your pan well so the fudge lifts out easily
- Stir constantly while melting to keep it smooth
Substitutions and Variations
- Swap peppermint extract for vanilla for a milder flavor
- Use dark or milk chocolate chips instead of white chocolate
- Add mini marshmallows for extra texture
- Sprinkle chocolate drizzle on top for contrast
Make Ahead Tips
You can make this fudge up to 5 days ahead. Store it in the fridge and slice when ready to serve.
Candy Cane Fudge Recipe & Instructions
Step 1: Prep the Pan
Line an 8×8 baking dish with parchment paper.
Step 2: Melt the Chocolate Mixture
In a saucepan, add 3 cups white chocolate chips and 1 can (14 oz) sweetened condensed milk. Heat on low, stirring constantly until fully melted and smooth.
Step 3: Add Flavor
Remove from heat. Stir in 1 teaspoon peppermint extract and 1/4 teaspoon salt into the melted mixture until fully combined.

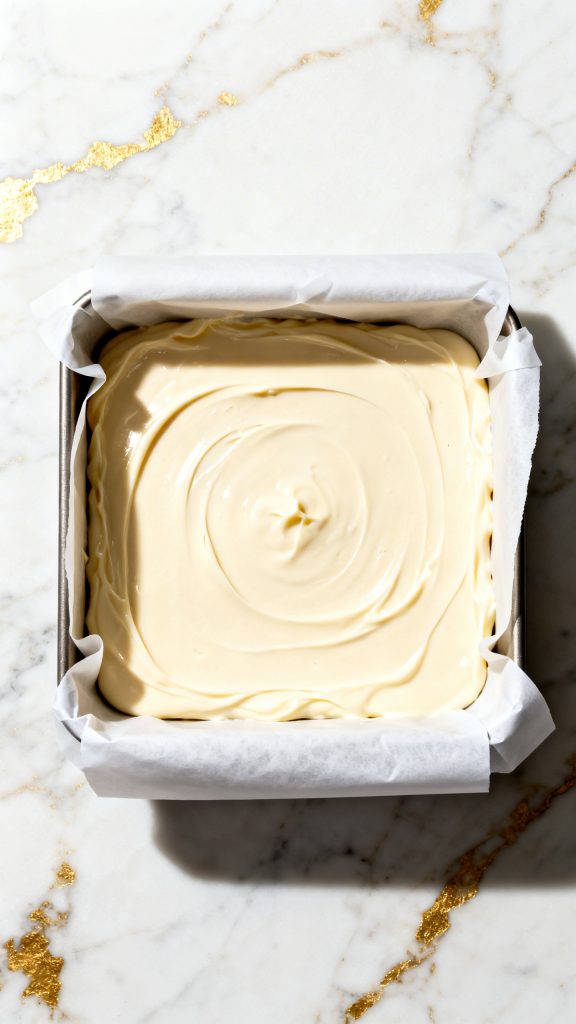
Step 4: Pour and Spread
Pour the fudge mixture into the lined pan and spread evenly.
Step 5: Add Candy Canes
Sprinkle 1/2 cup crushed candy canes evenly over the top and gently press them in.

Step 6: Chill
Place in the fridge for at least 2 hours until firm, then cut into squares.
Image Prompt:
Ultra close-up of firm candy cane fudge being cut into neat squares with visible crushed peppermint topping, clean edges and creamy texture, a straight 90-degree top-down shot with no tilt, captured directly overhead, on a white marble surface with gold hints

Why This Recipe Works (Quick Science)
Sweetened condensed milk acts as both a sweetener and stabilizer. It keeps the fudge soft and creamy. White chocolate melts smoothly and firms up when chilled, creating that perfect sliceable texture. The peppermint extract adds flavor without changing the consistency.
Macros Information (Per Piece)
- Calories: ~180
- Fat: 8g
- Carbs: 26g
- Sugar: 24g
- Protein: 2g
Common Mistakes
- Heating too fast: This can burn the chocolate
- Not stirring enough: Leads to uneven melting
- Adding too much peppermint: It can overpower the flavor
- Skipping parchment paper: Makes removal difficult
What to Serve With
- Hot cocoa
- Coffee or espresso
- Vanilla ice cream
- Holiday cookie trays
Leftovers and Storage
Store in an airtight container in the fridge for up to 1 week. You can also freeze it for up to 2 months. Let it sit out for a few minutes before eating for the best texture.
FAQ
Can I use peppermint oil instead of extract?
Yes, but use less—it’s much stronger.
Why is my fudge grainy?
It likely got too hot. Melt slowly over low heat.
Can I double the recipe?
Yes, just use a larger pan and spread evenly.
Do I have to refrigerate it?
Yes, that’s what helps it set properly.
Final Thoughts
This candy cane fudge is simple, festive, and always a hit. It’s one of those recipes you’ll come back to again and again because it just works. Give it a try, and don’t forget to share how it turned out for you!