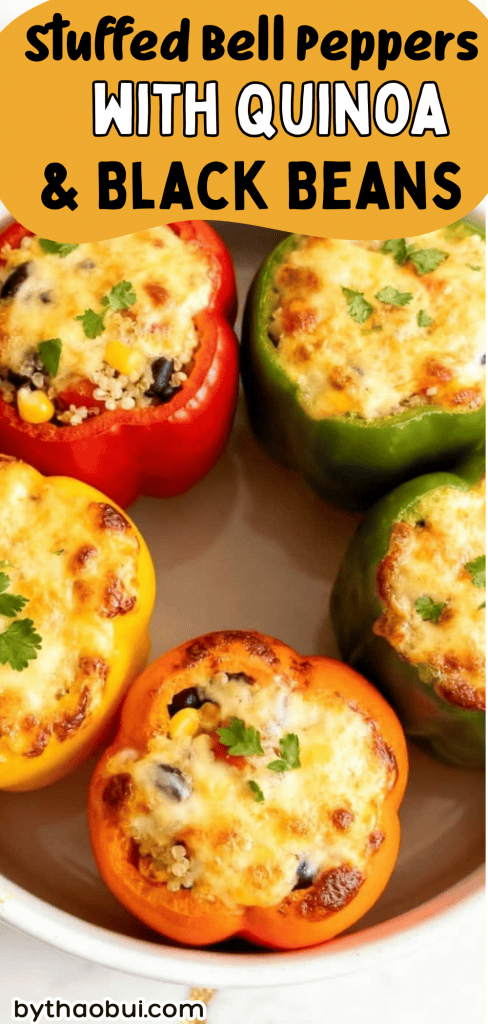
Stuffed Bell Peppers with Quinoa & Black Beans
Stuffed bell peppers are one of those classic, cozy recipes that feel like a hug in a bowl.
They’re hearty, super colorful, and packed with good-for-you ingredients.
I love how simple they are to make, but they look impressive enough for a dinner party.
You’ll fill tender bell peppers with a savory mix of quinoa, black beans, and spices, top them with melty cheese, and bake until bubbly and golden.
So good.
Why I Love This Recipe
This recipe is one I keep coming back to, especially when I want something filling and healthy without making a huge mess. I first made it when I had leftover quinoa in the fridge and some random bell peppers, and it just came together perfectly. Since then, it’s become a go-to for weeknights or when I want to meal prep a few lunches ahead of time. Here’s why I think you’ll love it too:
- It’s naturally vegetarian and packed with protein from quinoa and black beans
- You can prep the filling ahead of time
- It’s colorful and makes your plate look exciting
- Tastes even better the next day
Servings: 4
Total Time: 45 minutes
What You’ll Need
- 4 bell peppers (any color), tops sliced off and seeds removed
- 1 tablespoon olive oil
- 1 small onion, finely diced
- 2 cloves garlic, minced
- 1 teaspoon ground cumin
- 1 teaspoon chili powder
- ½ teaspoon salt
- 1 cup cooked quinoa
- 1 (15 oz) can black beans, drained and rinsed
- 1 cup canned diced tomatoes, drained
- ½ cup frozen corn
- 1 cup shredded Mexican blend cheese, divided
- 2 tablespoons chopped cilantro (plus more for garnish, optional)

Pro Tips
- Cut the very bottom off the peppers if they don’t stand upright—but don’t cut into the pepper too much or your filling might spill.
- Don’t overcook the peppers—you want them soft but still holding their shape.
- Make the filling a day ahead and just stuff and bake when ready.
- Add a few spoonfuls of salsa to the mix for extra flavor.
- Bake them snugly in a dish so they stay upright.
Tools You’ll Need
- Large skillet
- Mixing bowl
- Knife + cutting board
- Spoon for stuffing
- Baking dish (round or square, oven-safe)
- Foil
- Cheese grater (if shredding cheese fresh)
Substitutions & Variations
- Use rice or couscous instead of quinoa
- Add cooked ground beef or shredded chicken if you want meat
- Swap black beans for kidney beans
- Skip cheese or use dairy-free for a vegan version
- Add jalapeño for some heat
Make Ahead Tips
You can make the filling 1–2 days in advance. Just store in the fridge and stuff the peppers right before baking. You can also freeze filled uncooked peppers, then bake straight from the freezer (add about 15 minutes to the baking time).
How to Make Stuffed Bell Peppers with Quinoa & Black Beans
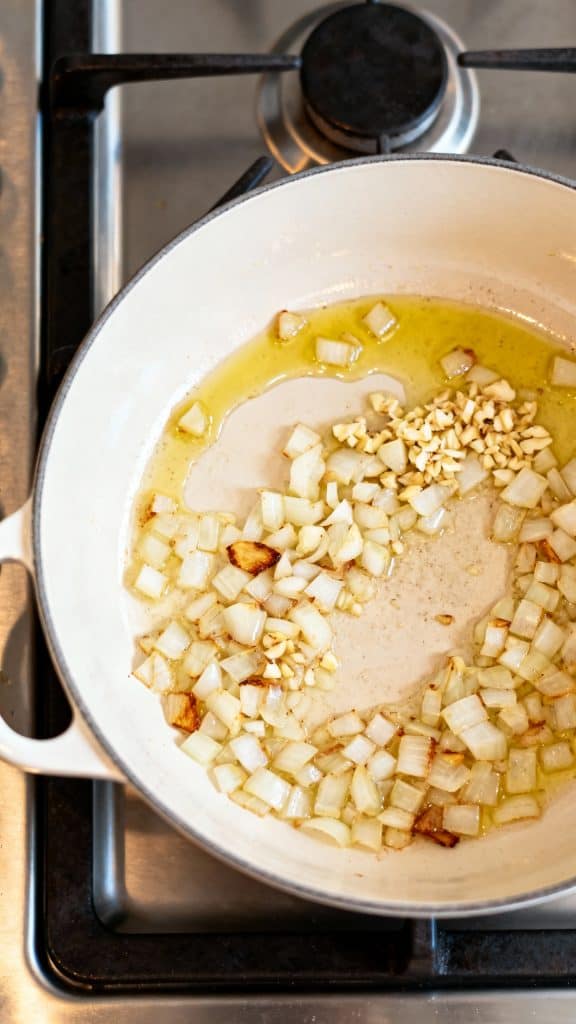
Step 1: Sauté the Onion and Garlic
Heat 1 tablespoon olive oil in a skillet over medium heat. Add 1 small onion (finely diced) and cook for 3–4 minutes until soft. Add 2 cloves garlic (minced) and cook for 1 more minute.
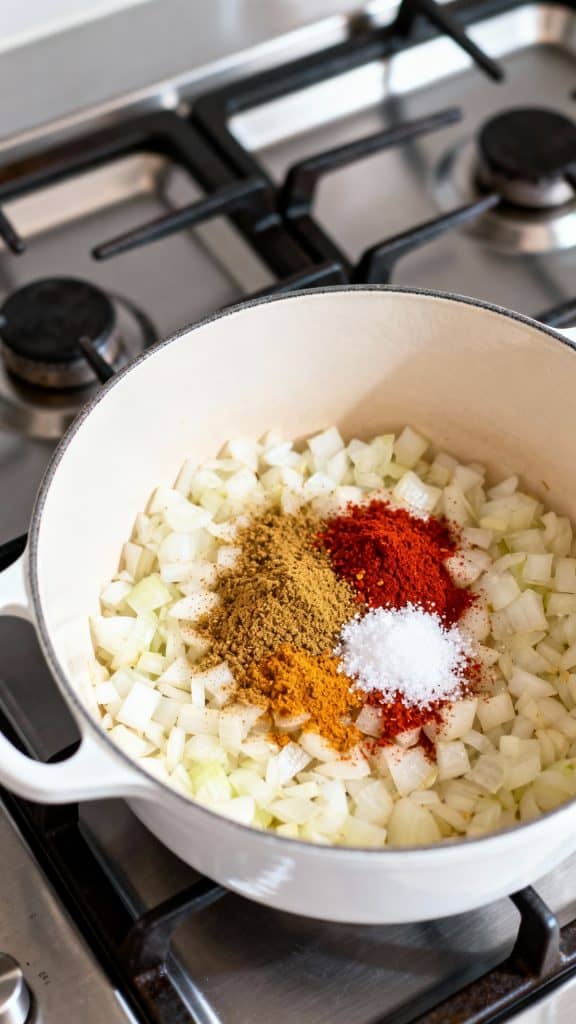
Step 2: Add Spices and Heat Them Up
Sprinkle in 1 teaspoon ground cumin, 1 teaspoon chili powder, and ½ teaspoon salt. Stir and cook for about 30 seconds to bloom the spices.
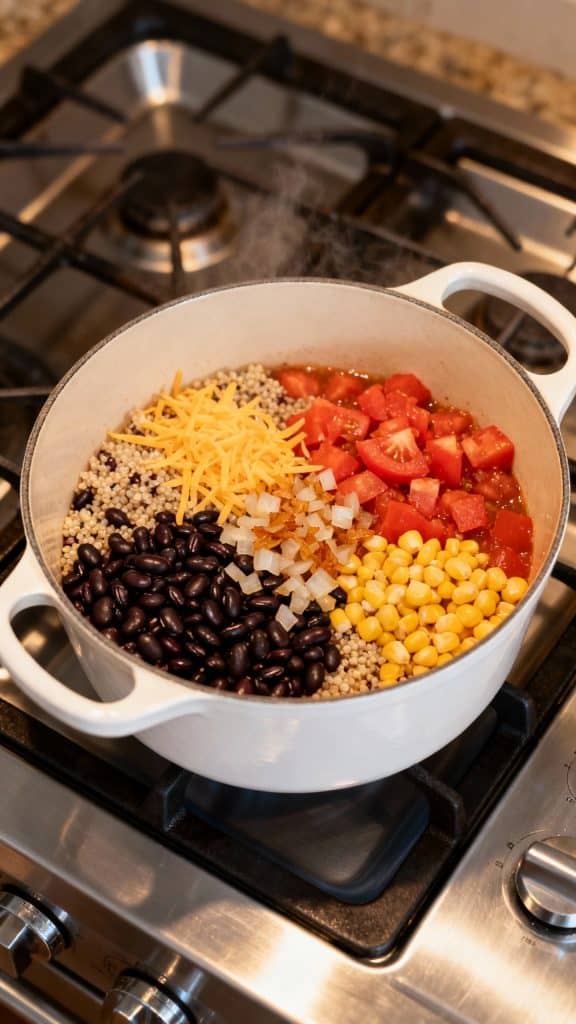
Step 3: Stir in the Rest of the Filling
Add 1 cup cooked quinoa, 1 can black beans (drained and rinsed), 1 cup canned diced tomatoes (drained), ½ cup frozen corn, and ½ cup shredded cheese. Stir until everything is combined and warm.
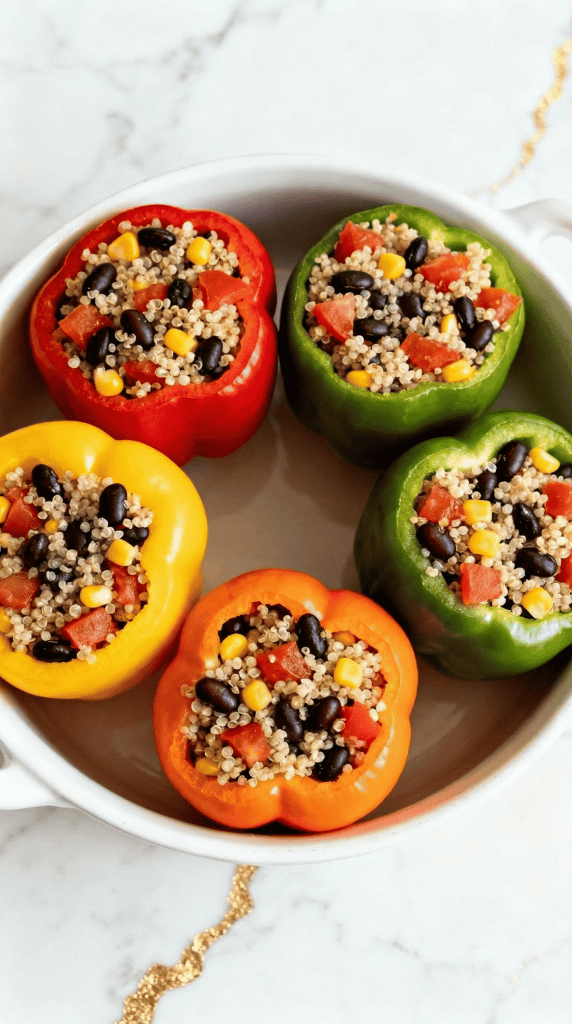
Step 4: Fill the Bell Peppers
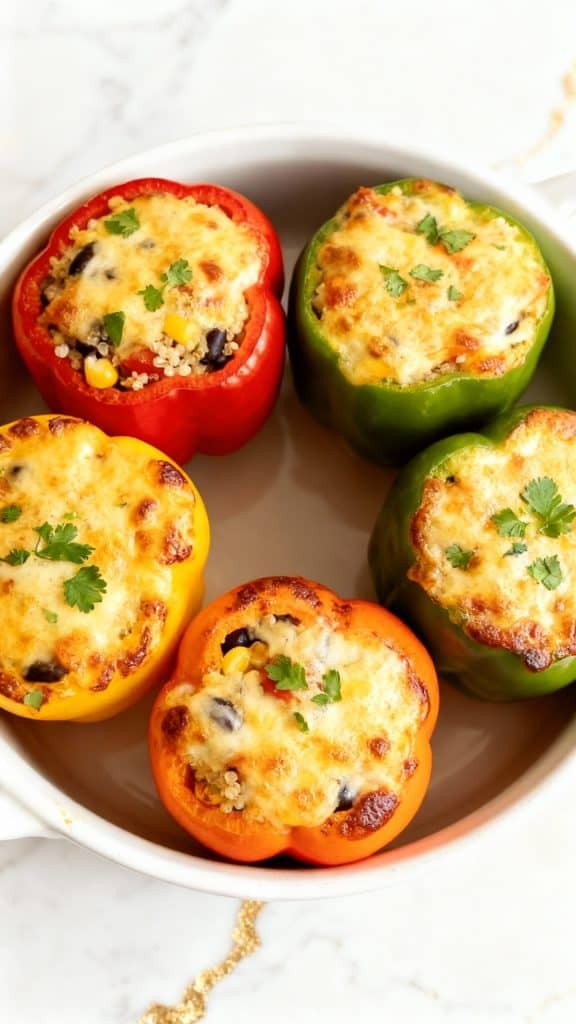
Spoon the filling into each of the 4 bell peppers, packing it in gently. Place peppers upright in a round baking dish.
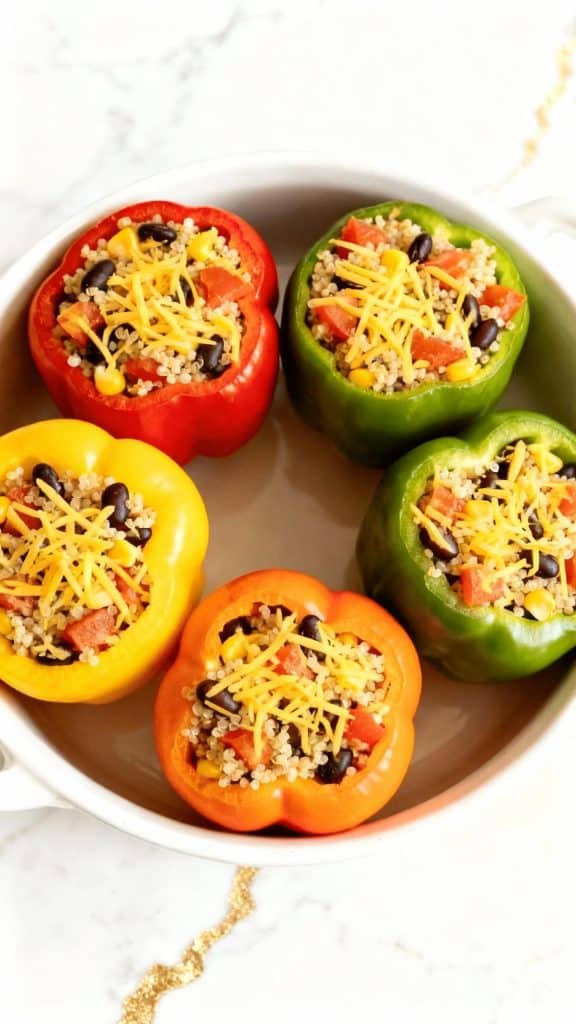
Step 5: Add Cheese on Top
Sprinkle the remaining ½ cup shredded cheese on top of each filled pepper.
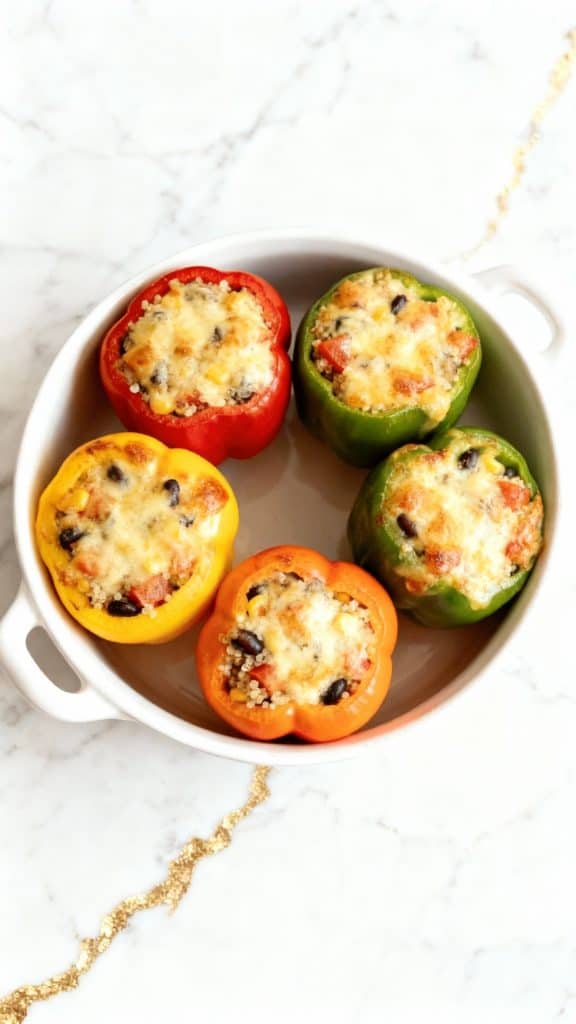
Step 6: Bake the Peppers
Cover the baking dish with foil and bake at 375°F (190°C) for 30 minutes. Remove foil and bake another 5–10 minutes until cheese is bubbly and golden.
Leftovers & Storage
Store leftovers in an airtight container in the fridge for up to 4 days. Reheat in the oven or microwave. You can also freeze cooked stuffed peppers for up to 2 months—just thaw overnight and reheat.
Macros (per stuffed pepper)**
Approximate values, will vary slightly by brand and ingredient used.
- Calories: 325
- Protein: 14g
- Carbs: 38g
- Fat: 13g
- Fiber: 10g
Why This Recipe Works (Quick Science)
- Quinoa holds its texture without getting mushy inside the peppers.
- Black beans bring fiber and creaminess while still keeping things firm.
- Spices like cumin and chili powder wake everything up with warmth and depth.
- Cheese on top helps seal in moisture and adds that satisfying melty finish.
Common Mistakes
- Overfilling peppers – This can make them fall over or spill during baking.
- Using raw peppers only – If your peppers are super thick, parboil them for 5 minutes first.
- Too much liquid in filling – Drain your tomatoes or you’ll get soggy peppers.
- Not enough seasoning – Taste your filling before stuffing to adjust salt or spices.
What to Serve With
- A fresh side salad with lime vinaigrette
- Tortilla chips and guacamole
- Roasted sweet potatoes
- Simple garlic sautéed greens
- A light soup like tomato or veggie broth-based
FAQ
Can I use brown rice instead of quinoa?
Yes! Just cook it ahead and use 1 cup.
Can I freeze these?
Yep! Freeze them after stuffing but before baking. Or freeze leftovers after baking.
Do I have to use all four pepper colors?
Nope, use whatever colors you have!
How do I make it spicier?
Add diced jalapeños or a pinch of cayenne to the filling.
Final Thoughts
These stuffed bell peppers are one of those easy wins you’ll come back to again and again. They’re colorful, full of flavor, and super satisfying. If you try it, leave a comment and let me know how it went—or any fun twists you added!